A Small Bridge
An article by Stephen McCallum aka fsm1000. This is an authorized repost of his article, which was
originally posted on his website which he is now planning to close (originally posted in 2009 on Model Railroad Tips).
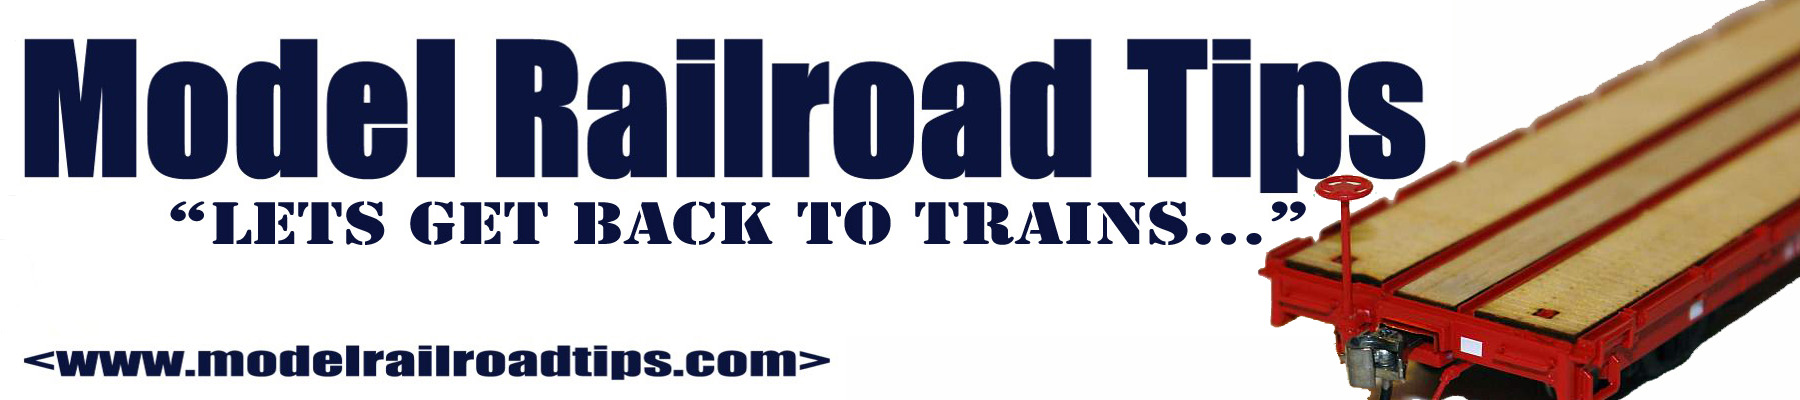
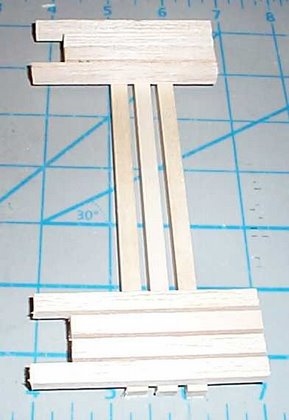
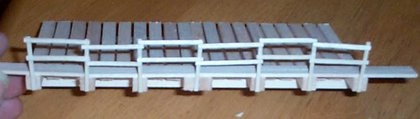
I have one area where I needed to complete a small bridge before continuing in my track laying. It is a simple
bridge and might be a good starter bridge for those of you who want to make your own bridges. The surrounding
area scenery will be covered in the scenery section I hope to include sometime later. For now I will concentrate
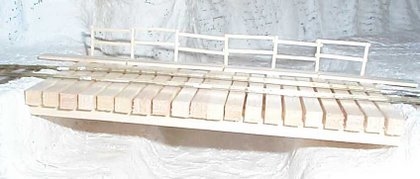
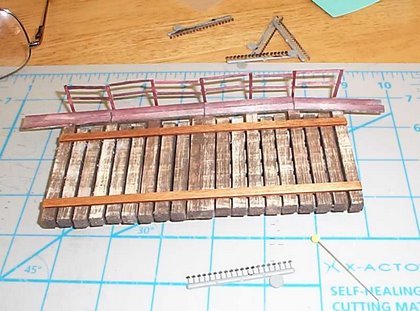
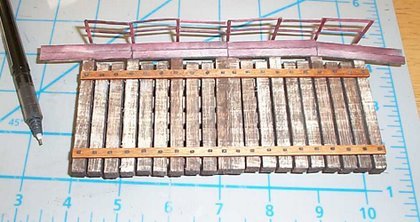
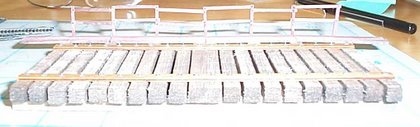
on the bridge itself. Here is a picture of what I made.
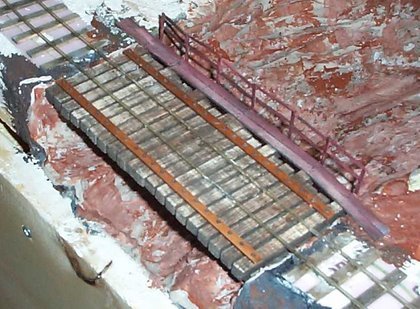
First thing I did was measure the space I needed to fill. I knew from experience that I put the plaster on thick
(about an eighth of an inch) so I took off a quarter inch (1/8th per side) from the over all length.
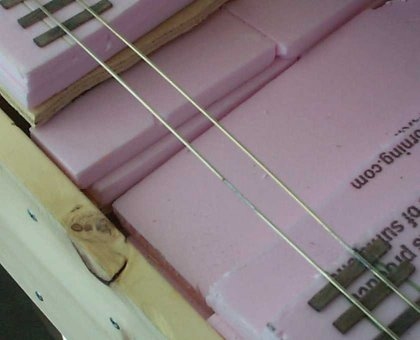
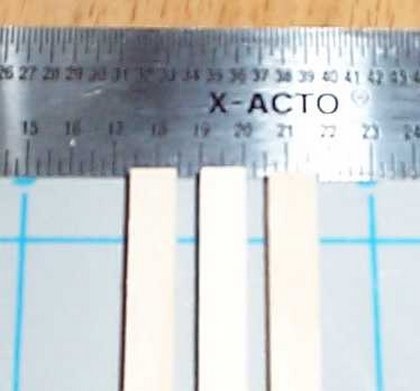
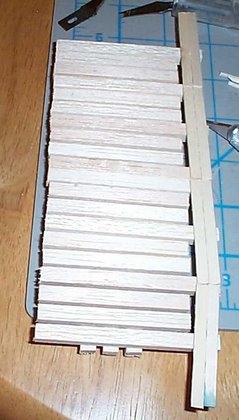
Next I cut out the wood to length.
I used balsa wood for the ties and basswood for the support beams. The beams will carry the real weight and so
I preferred to use basswood which is stronger then balsa. The ties, for the most part, are decorative and don't
really need to carry a load. No On30 engine is heavy enough to crush balsa wood by just sitting on it. The wood is one scale foot, or 12 inches, in width.
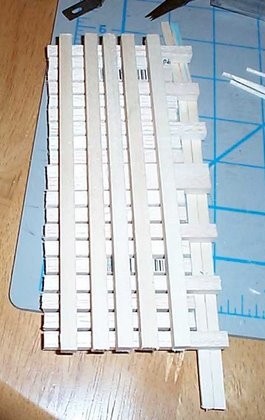
I glued on the two end pieces to the support beams.
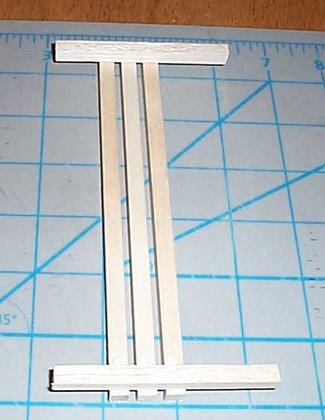
This will help stabilize the thing as a unit while I add the other pieces. If your measuring techniques are not great,
you can start at one end and work over to the other end. Just try to keep everything lined up and straight as you
do this.
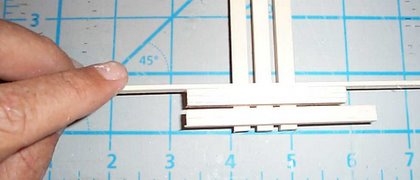
Next, I used a piece of wood I knew was 1/16th of an inch thick as a spacer. Because for this bridge I worked it
out that I needed 3 inches between the ties for spacing.
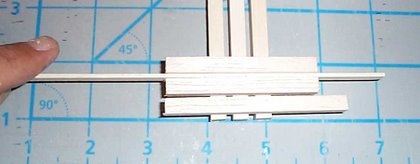
In order to put in a walkway later, every third tie is made two feet longer then the others.
The other side however, is kept even and straight.
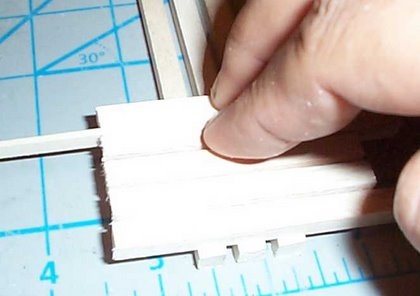
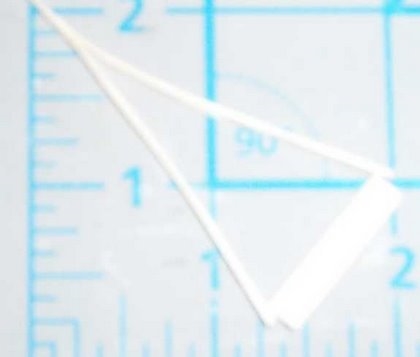
Next I took a thin piece of basswood and cut it into very thin strips.
Use a new blade if you do this. A dull one can slip and cut you. Also you have more control with a sharp blade. I
took my time and this is the result.

You can buy thin wood for this. I cut mine to a scale 1 1/2 inches (1/32 inch) by 4 inches (16/48s or 1/3rd inch)
about. I would buy 1/32 by 1/16 inch wood if I went that way. Next I added the walkway planks.
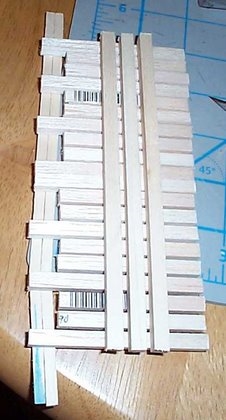
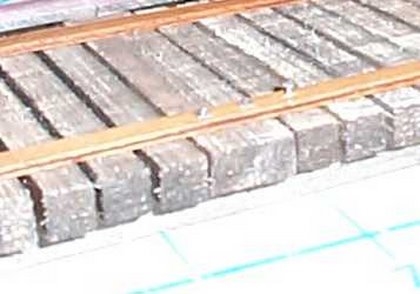
I used 9 inch wide planks (3/16ths). I also cut them to length to fit neatly over the long ties. They span three ties
fitting from the middle of one support to the middle of the other support.
glued them not straight on purpose. I wanted them to look almost like an afterthought. Not too professional, but
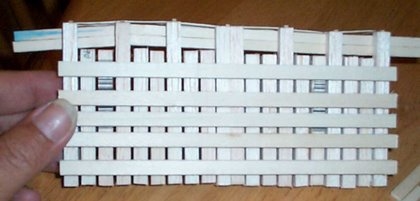
not to sloppy either. When that dried I added the rest of the basswood support beams.
You will notice I put one beam under each rail (where the rail would be on the other side). This is to make it a
real supporting structure and not just cosmetic. Even though they won't be seen, I put them in for stability, not
just for the trains to go over, but also from temperature and humidity changes. Probably overkill but what the
heck. :) It works for me. The railing supports are cut to length.

The railings themselves would have to be cut to length as I go.
Railing supports are glued into place.
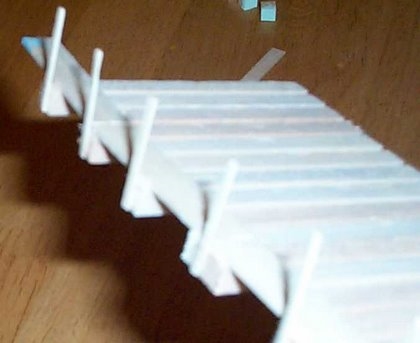
Only a small dab of glue is needed.
The railing is done (except for colouring of course).

I staggered the wooden railing parts to give it a rustic feel.

A test fit before continuing.
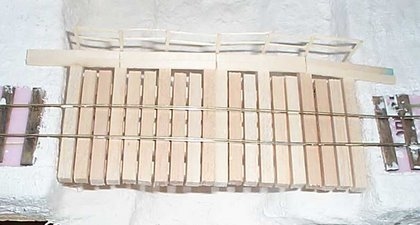
Better to cut it now, BEFORE painting, if it needs it.
I gave it a wash of dark (chocolate) brown.
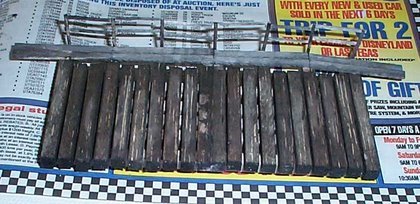
I know it looks black, but it is brown. I used one part paint and five parts water. Next I made a wash of red paint.
One part paint to three parts water.
Then I painted the walkway and railings red.

Be careful to let it dry between coats, at least a little bit, otherwise you may soak the glue and it can come apart.
If that happens don't panic. Just continue painting and later simply reglue the piece back on. That's it. Make sure
you put a lot less on to the railings. The walkway part should get much more. It is harder (not impossible though)
to distress the railings then the walkway which is why I put less paint on the railings. Next I used a wire brush
and distress it.
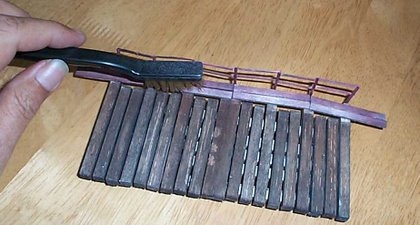
AFTER it had dried (in my case it was only a few hours). I go along the grain of the wood.
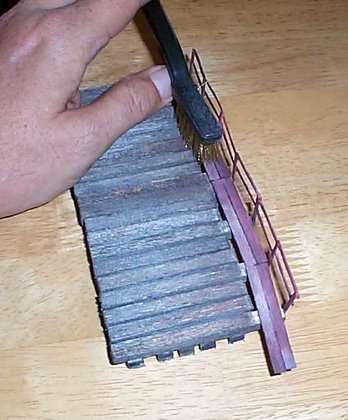
I did the walkway and the ties. Next I got some dark brown shoe polish...
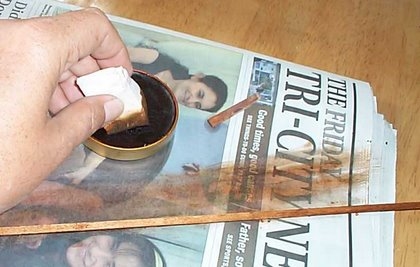
…and using a makeup sponge I dabbed the polish and then dabbed a piece of wood.
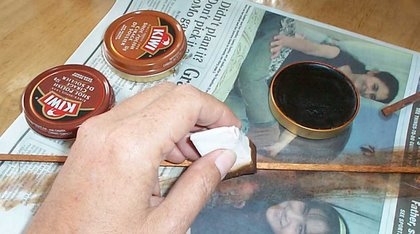
When it looked about right I stopped adding polish. The wood can be 9 to 12 inches wide.
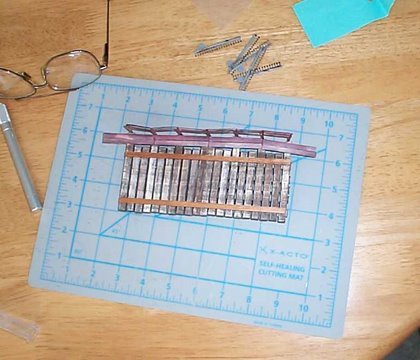
I used 1/16 inch thickness which made it 3 inches thick. I then glued the guard rails into place.
Using a pin (get one like I have that has a pusher on the top so when you push on it, it won't go through your
finger) I made a hole in the top of the guard rail over the middle of each tie.
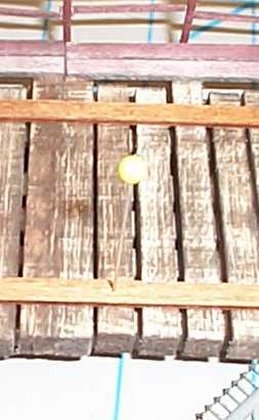
I slowly pushed the pin in the wood and moved the pin in a circle making the hole, as I went down, a little larger.,
almost a thin cone shape. This will allow you to put the nut and bolt fittings in the holes easier...
...and yet also provide some "grab" when it is all the way in the hole.

It is tedious so don't get frustrated. Take a break if you need it. I think it looks good though and worth the effort.
Using the felt pen you saw in the last picture, I used it to make dots on the railing to indicate nail heads.
I just put a dot in the middle of each intersection. From a couple of feet (as in, from where I stand looking at it) it
looks real enough. I then added it to the layout (scenery is not 100% done yet though) and I think it looks pretty
good.
I hope this has inspired you to give one a try. It is not that hard really. Measure a lot. Even make a diagram
ahead of time may help too.
Mostly, just enjoy yourself, this is not a race. This took me a whole day, and this included drying times for the
glue and paint. I figure about 12 or so hours altogether. Start the cutting and gluing in the morning. Let dry an
hour then paint it. Let dry some more then do the detailing and you are done.
Have fun.
© 2009, Stephen McCallum aka fsm1000, http://www.modelrailroadtips.com